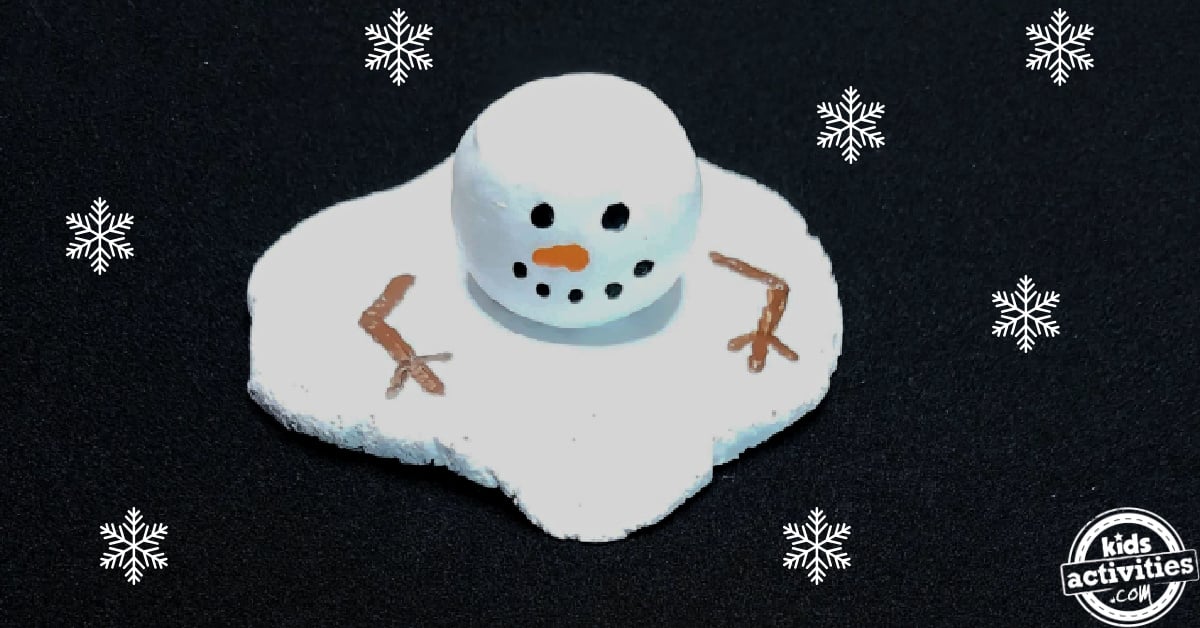
Today we are doing a melted snowman craft! This snowman craft was inspired by Frosty the Snowman. Kids of all ages will have so much fun putting together their melted snowman. It’s a unique and budget-friendly craft, but a fun way to spend a winter afternoon inside. You can make this melted snowman craft at school in the classroom or at home.
Melted Snowman Craft
Snowmen are fun to build, but at some point we must say goodbye to our icy friends. But this melted snowman craft lets you keep your frozen friend, albeit, a little deflated.
Kids will get to sculpt and practice fine motor skills with painting their snowman and adding details to the face as well as the other parts of the snowman. It’s a simple, but fun snowman craft. So, without further ado, let’s make melted snowman!
This post contains affiliates.
Related: Make a snowman paper snow globe!
Supplies Needed To Make A Melted Snowman
Salt Dough Recipe:
If your dough isn’t coming together add a little more water. If it’s too wet, add a little more flour.
Other Supplies:
How To Make This Melted Snowman Craft
Step 1

Mix together the flour and salt and add the warm water and mix until you have a dough formed.
Step 2

Roll out 2 balls. Flatten one of the balls until it’s about 1/4-to 1/2 inch thick. It’s okay if it’s not a perfect circle. Puddles rarely are.

Put the second ball on top of the flat dough.
Step 3
Bake your snowman for 2-4 hours at 200 degrees F or you can let them air dry for 72 hours.
Craft Notes:
Keep an eye on the ornaments.
Decorating Your Melted Snowman
Step 1

Paint the snowman white using the white paint.
Step 2

Add details like black coal eyes, a mouth, a carrot nose, stick arms. And you’re done!
How To Make This Melted Snowman Craft Your Own
Just like all our other winter crafts, you can make this craft your very own to fit your families needs. You can make changes like:
- Add a tiny top hat.
- Using black and orange paper for the details.
- Add glitter to your melted snow.
- Use black card stock or orange card stock for the details.
- Use markers to decorate this fun winter craft.
- Add some white dots to the black details to make black buttons
- Use large pom poms as the head and glue them on.
- Add small googly eyes.
- Add a hole before baking and turn this melted snowman into an ornament to hang on the Christmas tree this winter season.

Our Experience With This Fun Melted Snowman Craft
We love easy crafts. And while it may not be a winter wonderland out here, the weather can still be yucky so it’s fun to watch movies and do simple winter crafts. This craft was based on the movie Frosty the Snowman (the old 1960s one). I was watching it with my kids and one of them decided they wanted a melted snowman. Kids are interesting. I asked him if he’d rather make a regular snowman, but he was determined for a melted Frosty. So, I obliged.
And you know what? It kind of worked out. Not only did we end up having fun making this unique craft, but we got to talk about why snowman melted and what happened to the water afterwards. So, it kind of became a movie meets craft meets science lesson?
Anyway, I hope your family had as much fun as we did making this melted snowman craft.
Materials
- Salt Dough Recipe:
- 2 Cups All Purpose Flour
- 1 Cup Salt
- 3/4 Cup Warm Water*
- If your dough isn’t coming together add a little more water. If it’s too wet, add a little more flour.
- Other Supplies:
- Acrylic Paint
- Paintbrushes
Instructions
- Mix together the flour and salt and add the warm water and mix until you have a dough formed.
- Roll out 2 balls. Flatten one of the balls until it’s about 1/4-to 1/2 inch thick. It’s okay if it’s not a perfect circle. Puddles rarely are.
- Put the second ball on top of the flat dough.
- Bake your snowman for 2-4 hours at 200 degrees F or you can let them air dry for 72 hours.
- Paint the snowman white using the white paint.
- Add details like black coal eyes, a mouth, a carrot nose, stick arms. And you’re done!
More Snowman Crafts From Kids Activities Blog
How did your melted snowman craft turn out?

